
You can wirelessly project content on your PicoPix Nano either with an iOS or Android device. This article explains you how to do it with an iOS device. Please read this article to know how to do it with an Android device.
Wireless projection with iOS devices
Take your iPhone and follow these steps:
- Turn on your iPhone's Wi-Fi
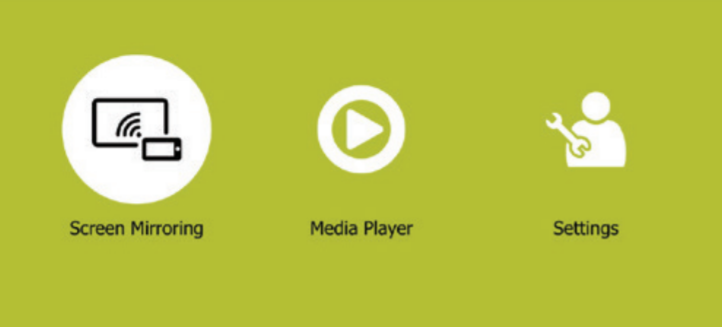
- Turn on your projector by pressing the Power button on the side of your projector. The Home Menu is displayed
- Use the Navigation button on the side of your projector, to select Screen Mirroring and then press OK on the side of your projector
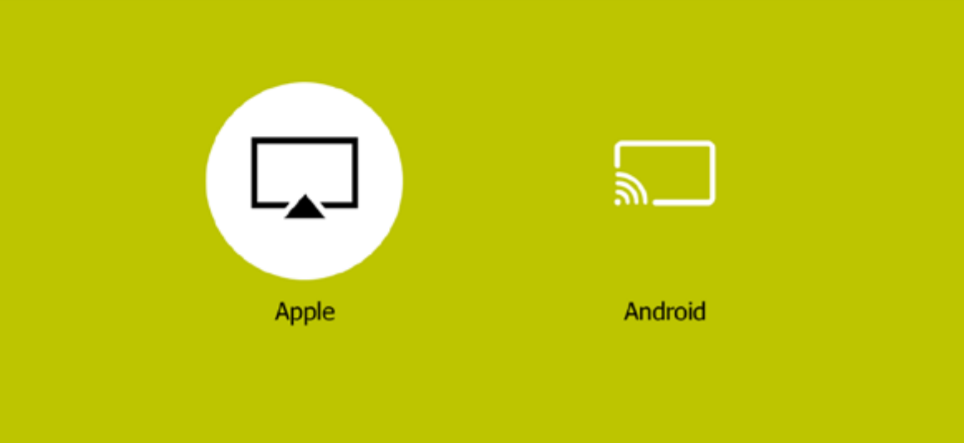
- The window for selecting a screen mirroring method is displayed: Apple and Android. Select Apple and press OK on the side of your projector, to enter the screen mirroring interface
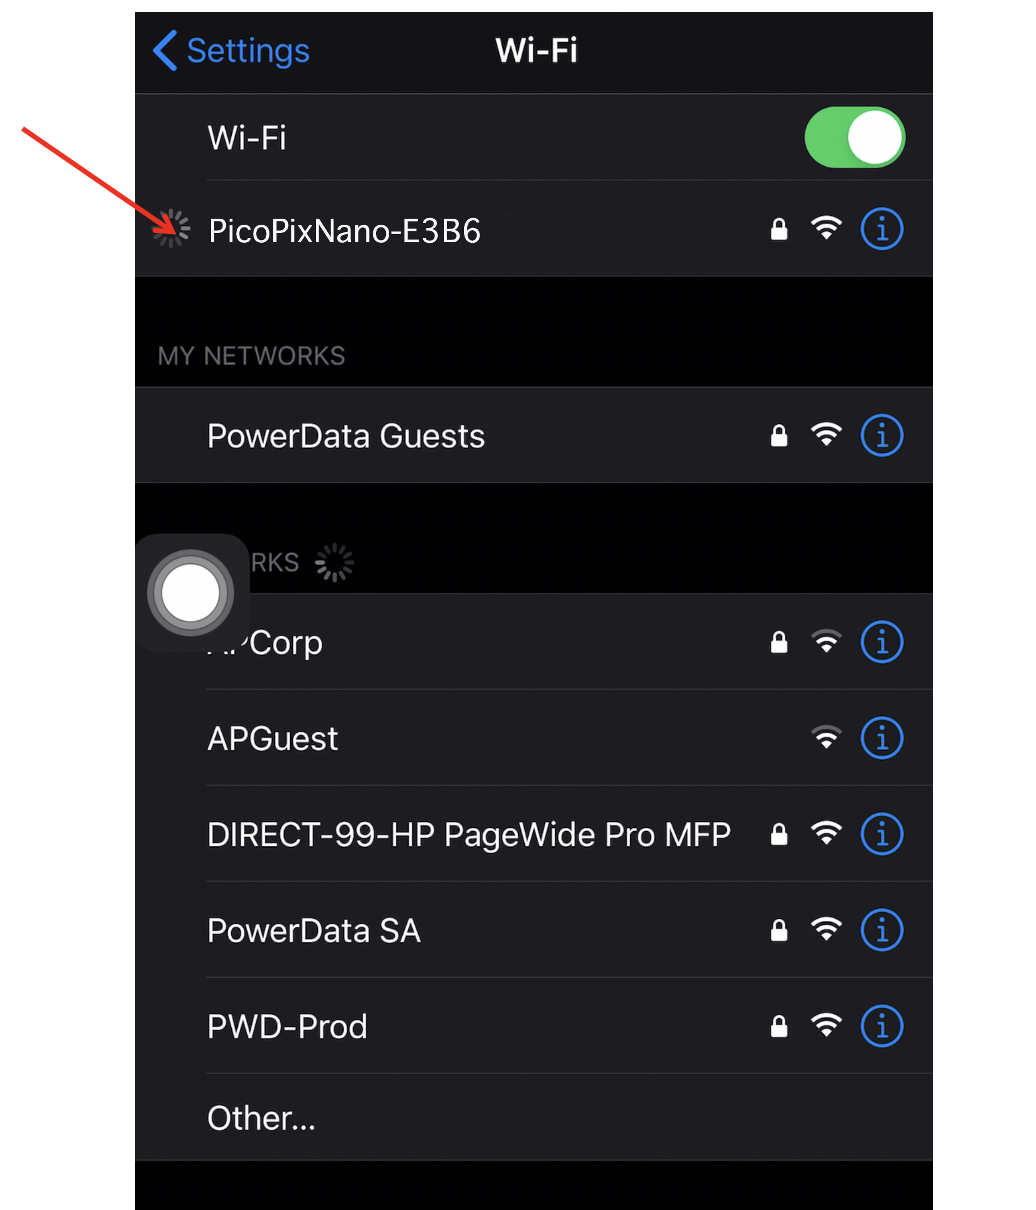
- In the screen mirroring interface, your projector name and password and an QR code are given

- On your iPhone, access the WiFi settings and select the WiFi network of your projector, then connect your iPhone to your projector’s WiFi. Or you may scan the QR code using a camera app on your smartphone to connect your iPhone to your projector’s WiFi
- On your iPhone, access Control Center by sliding the screen up, and select the Screen Mirroring option. Then select your projector name under Screen Mirroring to connect your iPhone to your projector
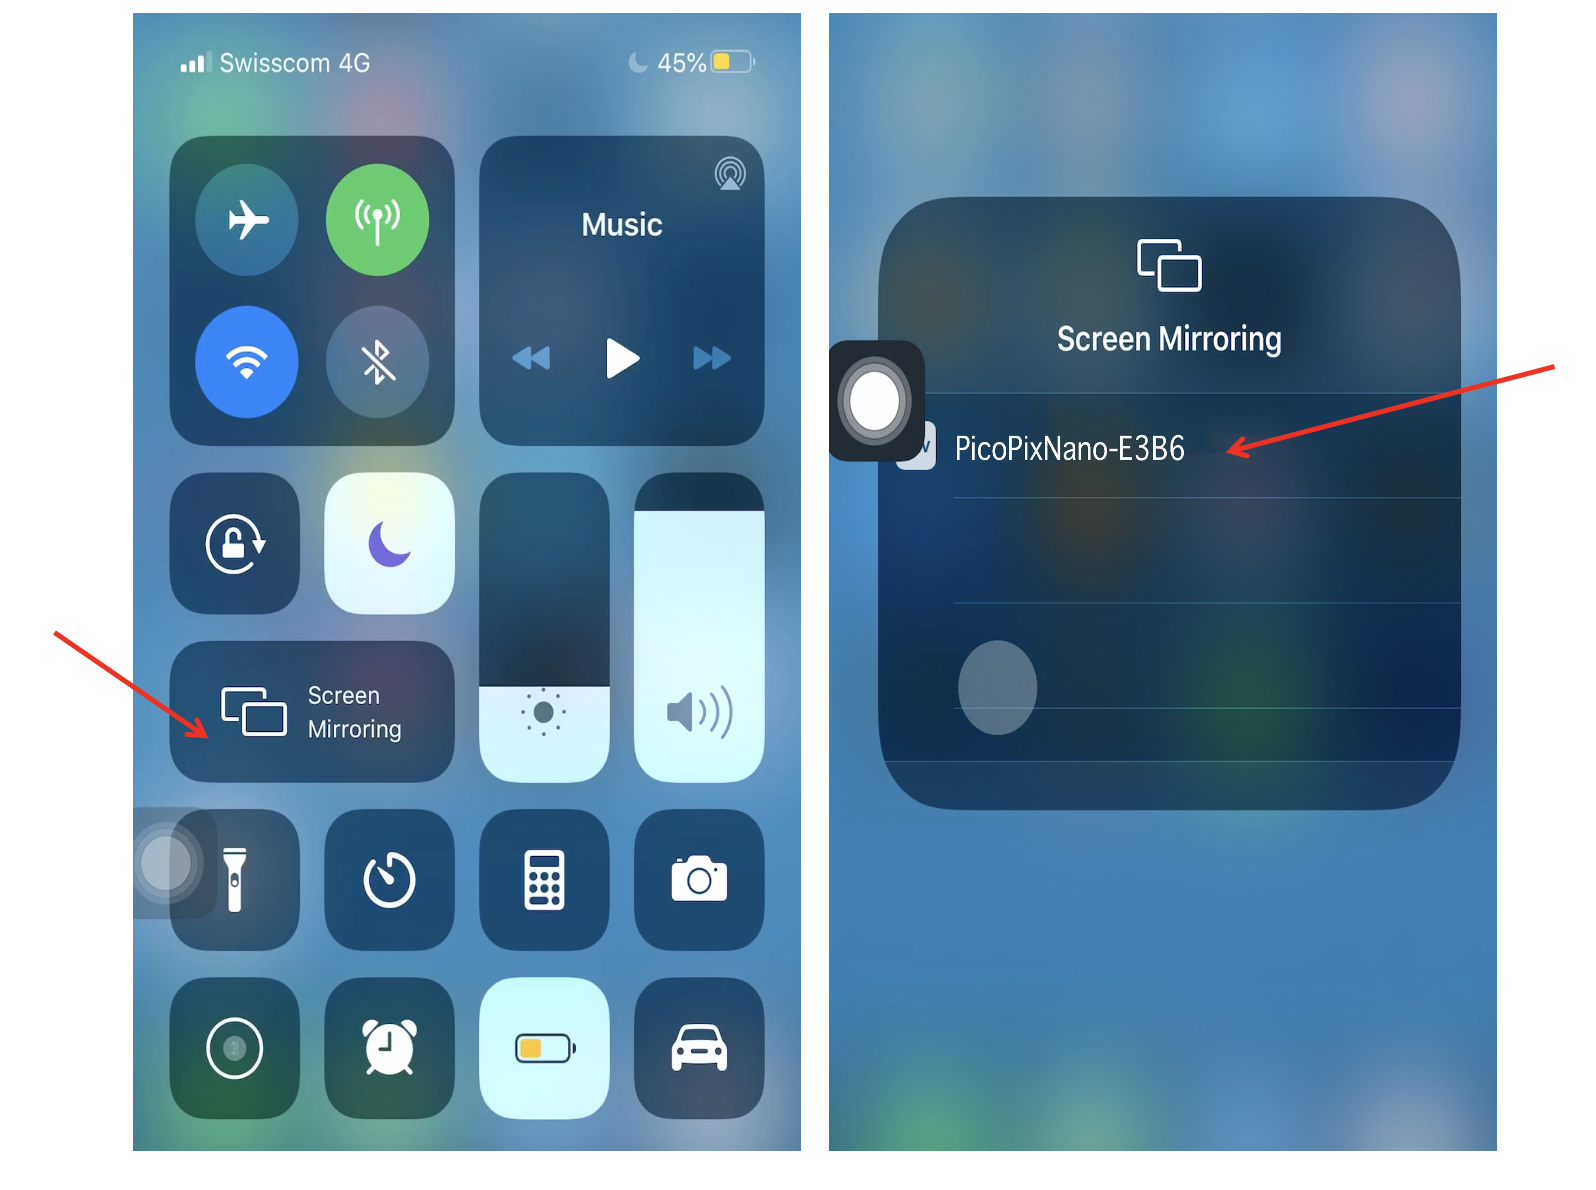
- After successful connection, the screen content of your iPhone is casted to the projection surface
Videos: You can also watch these Youtube videos to learn how to use the Screen Mirroring with Android
- iPhone, iPad:
If you face any issues related to the screen mirroring, please read this article.
Note that due to content protection (DRM), Wi-Fi screen mirroring can't be used to stream platforms like Netflix, Hulu, etc., unless used via Google Chrome from a Mac or PC.
Comments
0 comments
Article is closed for comments.